Why Your Pool Pump Keeps Failing (And How to Stop It)
If your pool pump keeps burning out, the problem may be air leaks and aging suction-side plumbing—not the pump. Learn what we look for and how to protect your system.
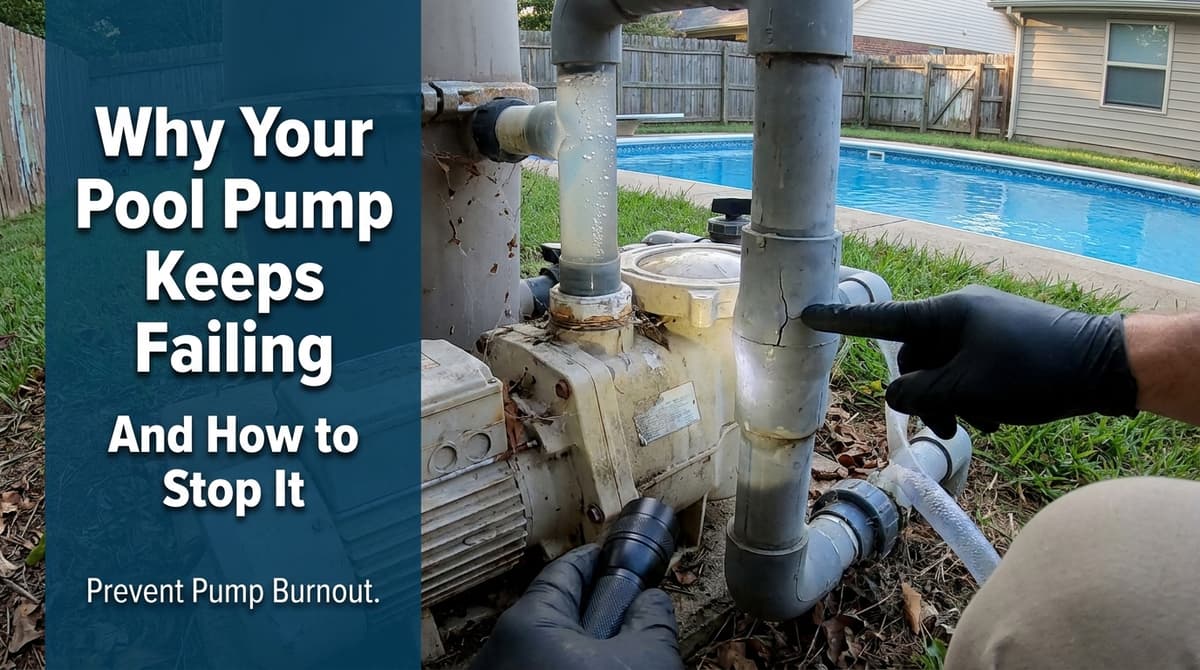
Why Your Pool Pump Keeps Failing (And It’s Not Just the Pump)
We recently got a call from a homeowner — let’s call him Mark — who was pretty frustrated. He’d already replaced his pool pump once, tested the capacitor, confirmed he had power to the equipment, and yet here he was again: the pump was dead for the second time in a year.
On the phone, Mark told us he suspected the problem wasn’t actually the pump. His equipment area was about 26 years old, and he thought the old suction-side plumbing and trap assembly were pulling in air and slowly burning out his pump. He wasn’t far off — and we see this kind of situation more often than most homeowners realize.
In this post, we’ll walk through what we look for when we come out to a home like Mark’s, why air leaks and aging suction-side plumbing are so hard on your pump, and what you can do to protect your system before you’re buying a new pump every season.
How Suction-Side Air Leaks Destroy a Good Pump
When we pulled up to Mark’s home, the first thing we noticed was the age of the equipment pad. Original plumbing, original suction trap, original valves — all pushing three decades old. The pump was newer, but everything feeding into it had been there since the pool was built.
That’s a classic recipe for suction-side air leaks. On the suction side (everything between the skimmer/main drain and the pump), even a tiny gap can let air in. The pump then has to move a frothy mixture of water and air instead of a solid column of water, and that’s where the trouble starts.
What Air in the System Does to Your Pump
Here’s what we see again and again when suction-side plumbing is leaking:
- Cavitation inside the pump: Air bubbles form and then collapse violently against the impeller. Over time, this can literally pit and chew up the impeller and volute.
- Overheating: Water cools the motor and pump housing. When flow is reduced by air leaks, the pump runs hotter and can cook the windings and bearings.
- Dry-running or partial dry-running: If the pump loses prime repeatedly, the seal and motor shaft are exposed to heat and friction, shortening pump life dramatically.
From the homeowner’s perspective, it just looks like “another bad pump.” From our side of the pad, we often find the pump was only the symptom. The real problem is the older plumbing pulling in air every time the system runs.
Common Suction-Side Trouble Spots We Find
On Mark’s system and many others like it, we work through a checklist of usual suspects. Most air leaks show up in a few predictable places.
1. Pump Lid and O-Ring
The clear pump lid and its O-ring are the first things we inspect. Over time, the O-ring flattens, cracks, or dries out. If the lid isn’t sealing perfectly, the pump can suck air every time it runs.
- What we look for: Cracked or flattened O-ring, debris on the sealing surface, lid that won’t tighten snugly.
- Fix: Clean the lid and housing, lubricate or replace the O-ring, and make sure the lid is properly tightened.
2. Suction Unions and Fittings
Next, we check the threaded fittings and unions on the suction side. On older systems, these fittings can loosen or crack from heat, sun, or ground movement.
- What we look for: Hairline cracks, weeping water, salt or calcium deposits, or bubbles visible in the pump basket.
- Fix: Reseal or replace unions and fittings, sometimes re-plumbing a short section to remove stressed or brittle pipe.
3. Old Valves and Suction Trap Assemblies
In Mark’s case, the big red flag was the 26-year-old suction-side trap and valve assembly. The body was discolored and slightly warped from years of sun and heat, and the lid ring was no longer perfectly round.
- What we look for: Warped plastic, stuck or loose handles, valves that won’t fully close or seal, and any visible flex when the pump turns on.
- Fix: Replace aging valves and, often, rerun the suction lines at the pad so they tie cleanly into the new pump.
What We Do During a Pump & Suction-Side Inspection
When we come out to a home like Mark’s, we follow a step-by-step process so we’re not just slapping in another pump and hoping for the best.
Our Typical Inspection Steps
- Visual check of the equipment pad: We look at the age and condition of pipes, valves, and fittings before we even flip a switch.
- Prime and run the pump (if possible): We watch the pump basket for bubbles, listen for cavitation, and check the pressure gauge behavior.
- Inspect all suction-side connections: We examine the pump lid, O-ring, unions, valves, and any above-ground joints for signs of leaks.
- Check water level and skimmers: Low water or blocked skimmer baskets can mimic air leak symptoms.
- Test electrical supply and components: We confirm voltage, inspect wiring, and check things like the capacitor so we’re sure the motor itself is good or bad.
- Evaluate overall design: We look at pipe sizing, length of runs, and how the suction lines are configured to see if the system is simply overworking the pump.
Only after we’ve gone through these steps do we recommend replacing the pump, repairing leaks, or re-plumbing the suction side. That way, we’re solving the root problem, not just the loudest symptom.
Simple Checks You Can Do Before Calling Us
There are a few safe, basic checks homeowners can do when they suspect air is getting into the system.
Homeowner-Friendly Troubleshooting
- Check your water level: Make sure it’s at least halfway up the skimmer opening. If it’s too low, the skimmer will gulp air.
- Clean skimmer and pump baskets: A clogged basket can starve the pump for water and cause it to lose prime.
- Inspect and clean the pump lid O-ring: Turn the power off, remove the lid, clean the groove and O-ring, lube it with pool-safe lubricant, and reinstall.
- Look for obvious leaks: While the system is running, look and listen for drips, sprays, or sucking sounds on the suction side.
If you do these basics and the pump still struggles to prime, runs noisy, or shows a lot of bubbles in the basket, it’s time for us to take a closer look.
When It’s Time to Replace Old Suction-Side Plumbing
We understand nobody is excited to hear, “You need more than just a new pump.” But in homes like Mark’s, where the plumbing is 20–30 years old, we’re often doing you a favor by recommending some fresh pipe and valves.
Two Real-World Scenarios We See Often
- The repeat pump fail: We arrive to find the second or third failed pump in a few years, all attached to the same brittle suction manifold from the 1990s. After re-plumbing that section with modern valves and fittings, the next pump runs smoothly for years.
- The “mystery” air leak: Everything looks fine at first, but under suction the old valves flex just enough to pull in air. Replacing that assembly solves what felt like an unsolvable priming issue.
Re-plumbing the suction side is often a one-time investment that protects every future pump you install. In many cases, we can also update you to a variable-speed pump at the same time, cutting your energy use dramatically.
Quick FAQ: Pump Lifespan, Costs, and Prevention
How long should a pool pump last?
In our climate and with proper plumbing and water flow, we usually see 7–10 years out of a good-quality pump. If you’re burning through pumps every 1–3 years, there’s almost always an underlying issue like air leaks, undersized plumbing, or poor circulation design.
What does it typically cost to fix this?
Every yard and system is different, but here’s a rough idea of what we see locally:
- Basic service call & minor repair: Inspecting the system and fixing a small issue like a lid O-ring or union typically starts with our standard service rate, plus parts.
- Partial re-plumb at the pad: Replacing old valves, fittings, and short runs of suction-side pipe is a moderate one-time expense that can save you from replacing pumps prematurely.
- Full pump replacement with plumbing updates: When we install a new pump, we often recommend correcting obvious plumbing issues at the same time so the new pump isn’t doomed from day one.
We always walk you through options on-site so you can decide what makes sense for your budget and how long you plan to stay in the home.
How can I keep my next pump from burning out?
Here are the habits we recommend to every homeowner:
- Keep water level up and baskets clean.
- Check the pump lid O-ring a couple of times a season.
- Have us inspect your equipment pad if it’s more than 15–20 years old.
- Consider upgrading old, sticky valves and brittle fittings before they fail.
If your pump keeps failing like Mark’s did, it’s a strong sign the problem is deeper than a bad motor. We’re happy to come out, track down the real cause, and help you get a system that runs quietly and reliably — instead of burning out your budget one pump at a time.